View recipe: Crispy Baby Yellow Potatoes
Paste this entire block into the WordPress code editor. The recipe image is already placed in the upper portion of the story. ```htmlYou Will Make These Crispy Potatoes. And You Will Love Them.
NOADS|COOKING / KITCHEN TECHNIQUES
A salty alkaline bath, a little rough handling, high heat, and you get crisp diced potatoes.
Have you ever noticed that potato becomes potatoes with an “e” when you have more than one? We don’t do that with pianos, radios, or avocados, but apparently potatoes need the extra vowel.
That is something I suppose we could explain here at NoAds|Cooking, but I really do want to tell you about the potato today. In particular, a version of it that has eluded me, much like remembering where I put my car keys, for the better part of two decades.
The great crispy diced potato.
Oh yes, you’ve seen them. You’ve had them. And the impression follows you around, mocking you every time you attempt them at home.
Maybe yours aren’t even that bad.
And if you read our piece on pork chops...
“Not bad” is not why we make the food, folks.
Not bad isn’t even okay when it’s just you and you can cook like no one is watching.
No, these potatoes must be great.
And they are. They’re excellent. And they’re easy.
NO WAY!!!
Way.
The Potato Does Most of the Work
There’s no soaking, drying, serenading, or elaborate kitchen ritual required.
In fact, like a lot of things you can make at home, the potato is doing most of the work alongside the elements and the control you apply.
But this isn’t the kind of particular attention where you need to turn something toward the sun before noon and water it at exactly 8 p.m. It’s more like dusting off that opened box of baking soda you’ve been reserving for your kid’s rancid sneakers, finding some salt, and getting ready to bake.
That’s right. Baking soda.
And if you’ve spent years wondering why your roasted potatoes never quite develop that magnificent, crunchy exterior you’ve had elsewhere, this might be the missing piece.
The technique isn’t something we invented here at NoAds|Cooking. J. Kenji López-Alt investigated and popularized this alkaline-water method in his Serious Eats article, The Best Crispy Roast Potatoes Ever. His testing explains why the method works and is worth reading in full. Here, we’re putting those principles to work with smaller, bite-sized potatoes in our own kitchen.
Choosing Your Potato
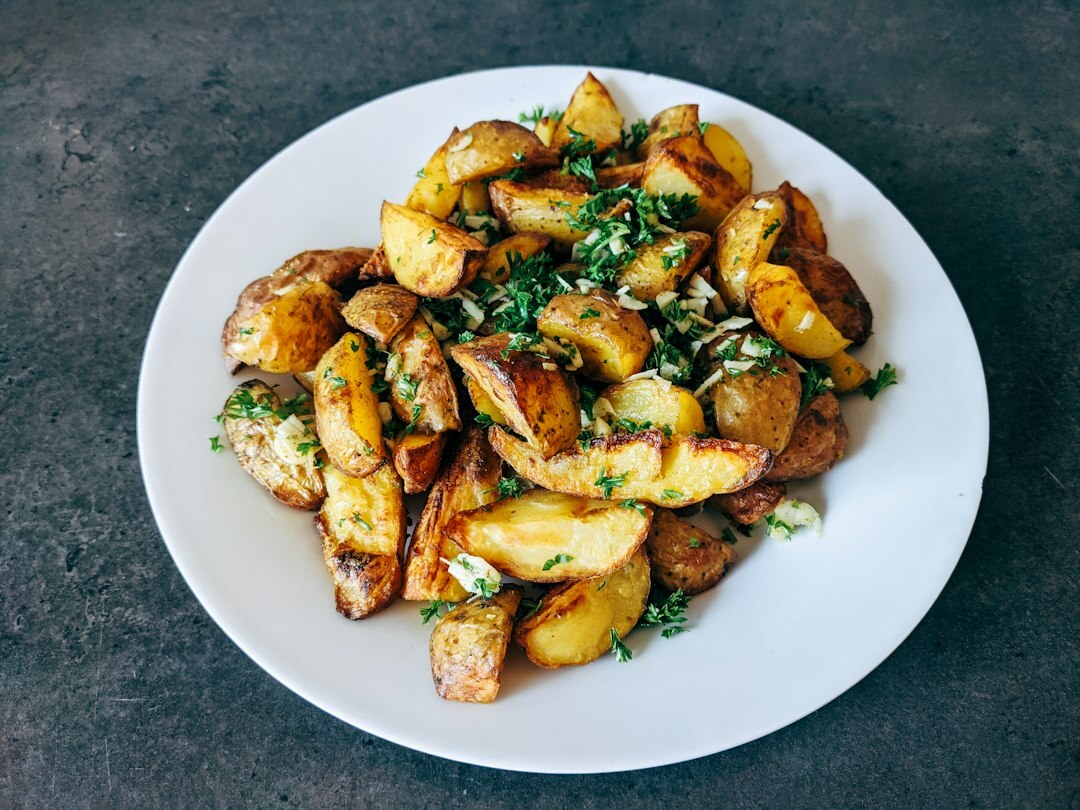
The first step is choosing your potato. You want something that leans toward a creamy interior while still having enough starch to develop a great crust. Yukon Golds are an excellent choice. Baby yellow potatoes work beautifully, too.
I used Idaho’s own baby yellows—there’s the missing “e,” again in case you’re paying attention.
Idaho is technically a growing region rather than a potato variety, and different varieties behave differently when cooked. Russets can develop an exceptionally crunchy exterior with a fluffy center. Yukon Golds offer a denser, creamier interior. Neither is inherently better. They’re simply different.
That’s part of what makes this technique so useful: you can change the potato and still produce something excellent.
For this version, cut them into rough, triangular, bite-sized pieces. Don’t worry about making perfect cubes.
We’re not building a retaining wall.
The Salty Alkaline Bath
While you’re chopping, get a pot of water boiling.
| For about 2 pounds of potatoes | Amount |
|---|---|
| Water | 2 quarts |
| Kosher salt | 1 tablespoon |
| Baking soda | 1/2 teaspoon |
The salt seasons the potatoes while they cook. The baking soda raises the pH of the water, making it slightly alkaline and encouraging the outer surfaces of the potatoes to soften and break down as they boil.
And that’s exactly what we want.
The goal isn’t simply to cook the potato. The goal is to create the material that will eventually become its crispy exterior.
Add the cut potatoes to the boiling water and cook until they’re tender enough to pierce with a fork. My batch for two took approximately 15 minutes. Depending on the size and variety, yours may take a little less or a little longer. You want them tender, but not disintegrating.
While they’re boiling, heat the oven and place a sturdy metal sheet pan inside so the potatoes meet a hot surface when they’re ready.
Now We Rough Them Up
Once the potatoes are tender, drain them into a colander. Don’t vigorously shake them around just yet. Let them sit for a few minutes so the excess moisture can steam away, then transfer them to a large mixing bowl.
How large?
About the size you’d use to toss chicken wings in sauce. If you’ve never done that before, imagine how big a bowl you’d need to comfortably toss a batch of wings without sending them across your kitchen. Try that one. If it’s too small, you’ll use a bigger one next time.
Drizzle the potatoes with an appropriate amount of olive oil or avocado oil. For about 2 pounds of potatoes, 3 tablespoons is a sensible starting point. Now start tossing.
Carefully.
What you’re doing here is commonly called roughing them up. I’d heard this term before, but it never made much sense to me. And even though I now understand what we’re trying to accomplish, I’m not entirely convinced the phrase makes any more sense than it did previously.
Either way, here’s what’s happening. The alkaline bath softened the outer layers of the potatoes. As you toss them, those surfaces begin to break apart, releasing starch and forming a thick, slightly pasty coating around the pieces.
It’s almost like a starchy foam. Not quite mashed potatoes. Not quite a batter. Something in between.
And this is the part you’ve been missing.
That coating creates an irregular surface with tiny edges and ridges. When exposed to high heat and oil, those surfaces lose moisture, brown, and become crisp. The more textured the surface, the more opportunities for crunch.
Keep tossing until the pieces look coated in a slightly creamy, starchy layer. Some corners will soften and crumble. That’s fine. That’s what we want.
Into the Oven
Get your oven mitts. Carefully remove the hot sheet pan from the oven and distribute the potatoes across its surface. Give them space. If they’re crowded together, they’ll trap moisture and steam instead of roasting properly.
Season with freshly ground black pepper and a little additional salt if needed, then return the pan to the oven.
Here’s where the size of your potatoes makes a difference. Kenji’s original method uses larger chunks and a longer roast. We’re working with smaller, bite-sized pieces, and my previous batch did not need nearly as long.
Start judging them by the exterior: deeply golden surfaces, visibly crisp edges, and pieces that release from the pan. Turn them if necessary to develop color on multiple sides. If they’re pale, they’re not finished. If they’re burning, you’ve gone too far.
Somewhere between those two conditions is the potato you’ve been looking for.
The Finish
Once the potatoes are deeply golden and crispy, remove them from the oven. You can eat them exactly as they are. And frankly, you probably should try one before doing anything else.
That first bite tells you whether the technique worked: a crisp exterior that gives way to a soft, creamy center.
That’s it. That’s the potato.
If you want to take things further, toss them with a little melted butter and fresh herbs. Rosemary, thyme, parsley, or chives all work beautifully. A little garlic is excellent, too, although I’d avoid adding fresh minced garlic during the initial roast because it can burn long before the potatoes finish cooking.
And if you’re serving these alongside a steak, roasted chicken, or those pork chops we keep talking about, you may discover that the potatoes are getting considerably more attention than the main course.
Not Bad Isn’t Good Enough
For years, I made roasted potatoes that were fine. Sometimes pretty good. Occasionally even great, at least until I tried making them again and couldn’t reproduce the results.
And that’s the frustrating part about cooking something seemingly simple. You know what you’re trying to achieve. You’ve eaten it before. You know it’s possible. But somehow, the version coming out of your own oven never quite gets there.
Then you discover that the difference isn’t necessarily an expensive ingredient, specialized equipment, or some elaborate technique.
Sometimes it’s half a teaspoon of baking soda.
A bowl.
And a little understanding of what you’re actually trying to accomplish.
No soaking. No serenading. Just a really, really good potato.
Or potatoes.
Still not sure why we need that “e.”
Crispy Baby Yellow Potatoes
See the full ingredient list and step-by-step method.
Cook this recipe